> ## Documentation Index
> Fetch the complete documentation index at: https://developers.uqpay.com/llms.txt
> Use this file to discover all available pages before exploring further.

# Webhook 设置

> 在 UQPAY 控制台配置 Webhook 端点以接收实时事件通知。

<h2 id="set-up-a-webhook">创建 Webhook</h2>

<Steps>
  <Step title="进入 Webhook 设置">
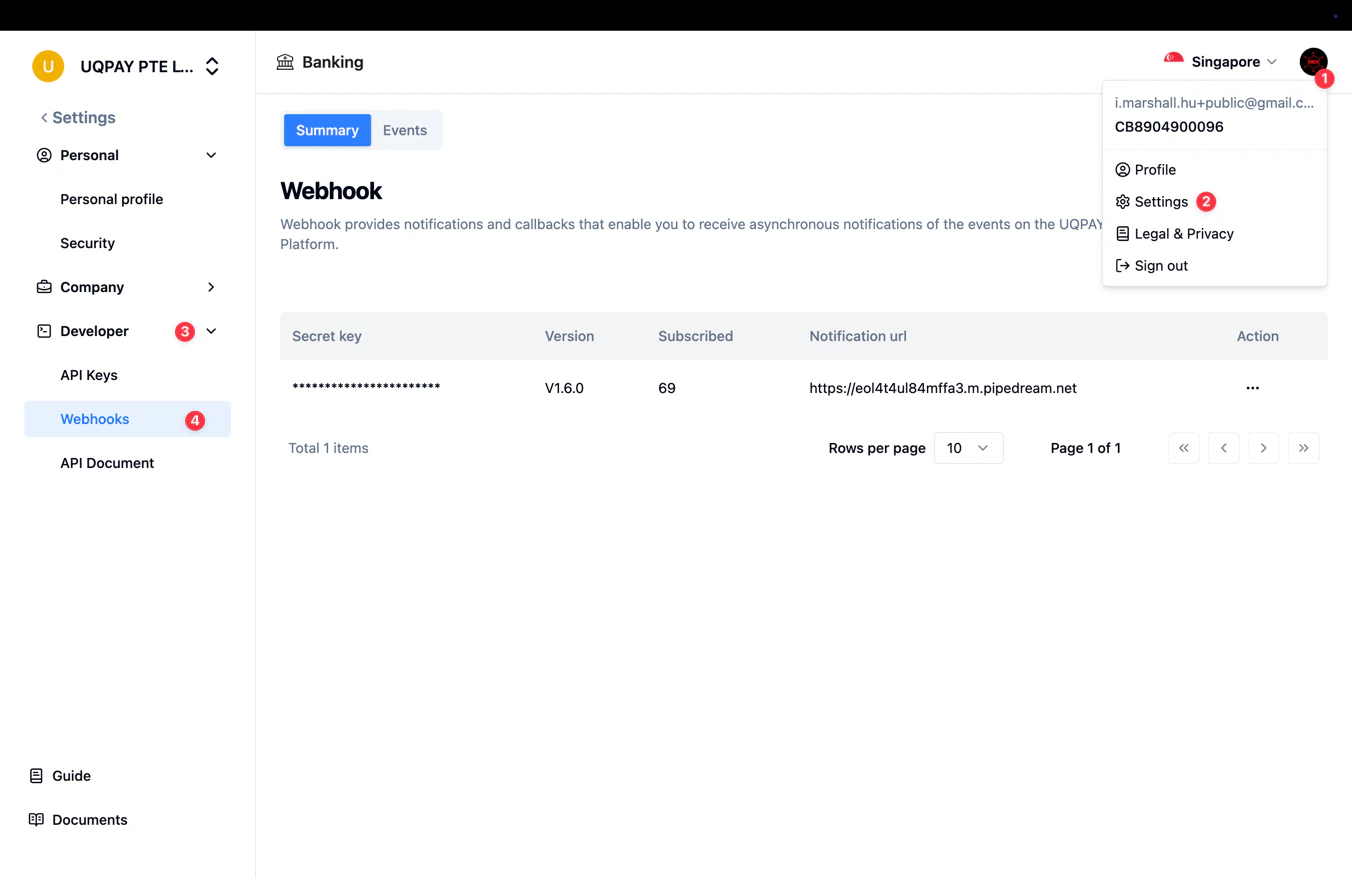
    登录控制台，点击右上角的个人头像，选择 **Settings**，然后依次进入 **Developer** → **Webhooks**。

    <img src="https://mintcdn.com/uqpay-0838527a/ynKaMDHkJfeg6L8y/images/account-center/webhooks-setting-s1.png?fit=max&auto=format&n=ynKaMDHkJfeg6L8y&q=85&s=ca4effe1628e831729ca0f1de587c2fa" alt="Webhook 设置页面" width="1352" height="878" data-path="images/account-center/webhooks-setting-s1.png" />
  </Step>

  <Step title="创建 Webhook">
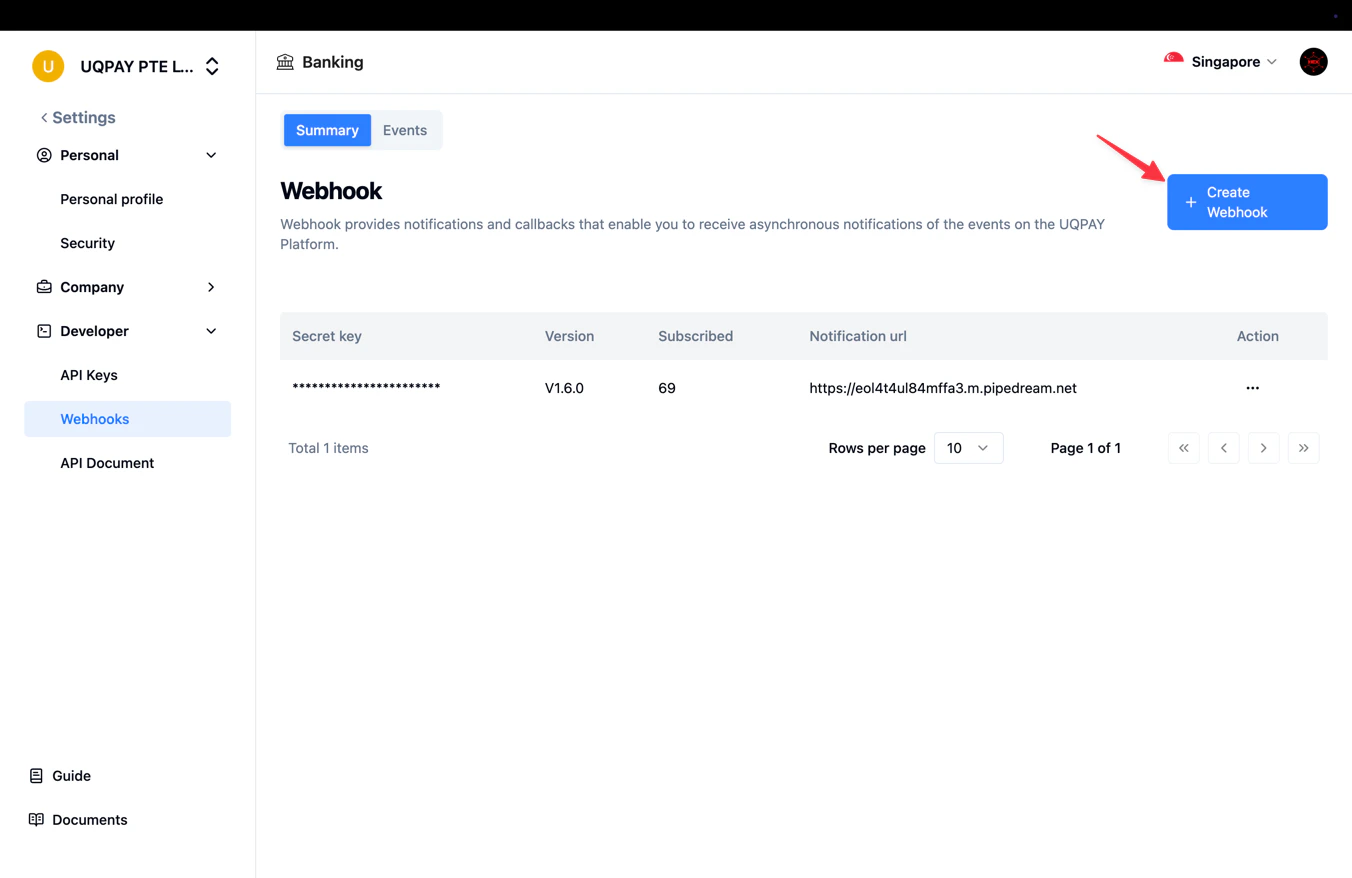
    点击右上角的 **Create Webhook**。

    <img src="https://mintcdn.com/uqpay-0838527a/ynKaMDHkJfeg6L8y/images/account-center/webhooks-setting-s2.png?fit=max&auto=format&n=ynKaMDHkJfeg6L8y&q=85&s=4ee006bfac31a8041ea8d5f80ae0578d" alt="Create Webhook 按钮" width="1352" height="878" data-path="images/account-center/webhooks-setting-s2.png" />
  </Step>

  <Step title="配置端点">
    填写 Webhook 详情：

    1. 输入**通知 URL** — 用于接收事件 payload 的端点。
    2. 选择要订阅的事件类型，或勾选 **Subscribe to all events** 订阅全部事件。
    3. 点击 **Create** 保存。
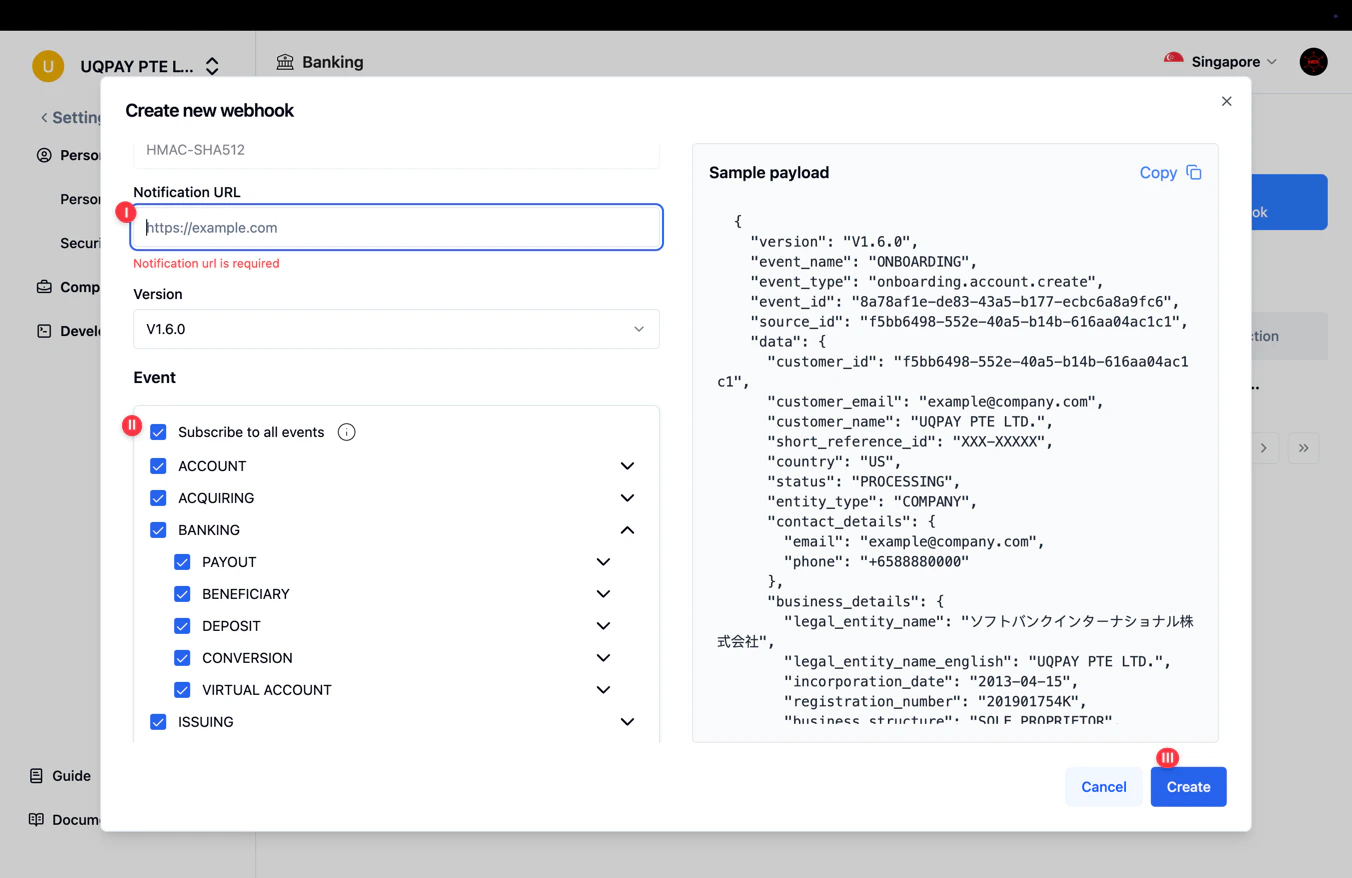
           <img src="https://mintcdn.com/uqpay-0838527a/ynKaMDHkJfeg6L8y/images/account-center/webhooks-setting-ss3.png?fit=max&auto=format&n=ynKaMDHkJfeg6L8y&q=85&s=b873c23422e95f24425ec364b3854a40" alt="Webhook 配置表单" width="1352" height="878" data-path="images/account-center/webhooks-setting-ss3.png" />
  </Step>

  <Step title="加白 UQPAY 的 IP 地址">
    为确保生产环境能成功收到 Webhook，请将 UQPAY 的 IP 地址加入你服务器的白名单。完整 IP 列表参见 [Webhook 概览](/zh/account-center/v1.6/guide/webhooks-overview)。
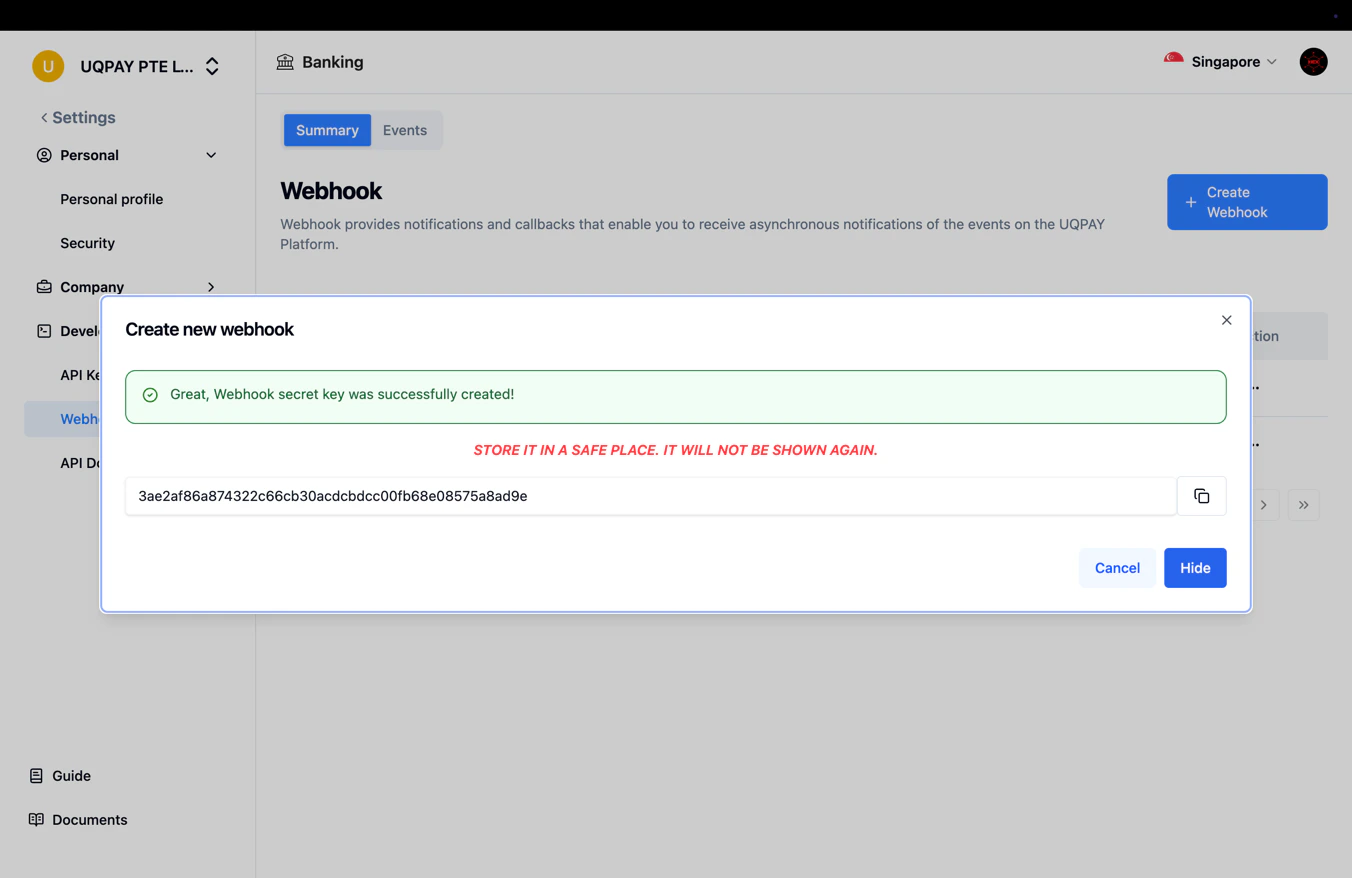
    <img src="https://mintcdn.com/uqpay-0838527a/ynKaMDHkJfeg6L8y/images/account-center/webhooks-setting-s4.png?fit=max&auto=format&n=ynKaMDHkJfeg6L8y&q=85&s=51fd07b4206481914d00f03498ce196e" alt="IP 白名单参考" width="1352" height="878" data-path="images/account-center/webhooks-setting-s4.png" />
  </Step>
</Steps>

<h2 id="check-previous-webhooks-or-re-trigger">查看历史 Webhook 或重新触发</h2>

你可以在控制台查看历史 Webhook 投递记录并重新发送。

1. 在 Webhook 页面切换到 **Events** 标签。
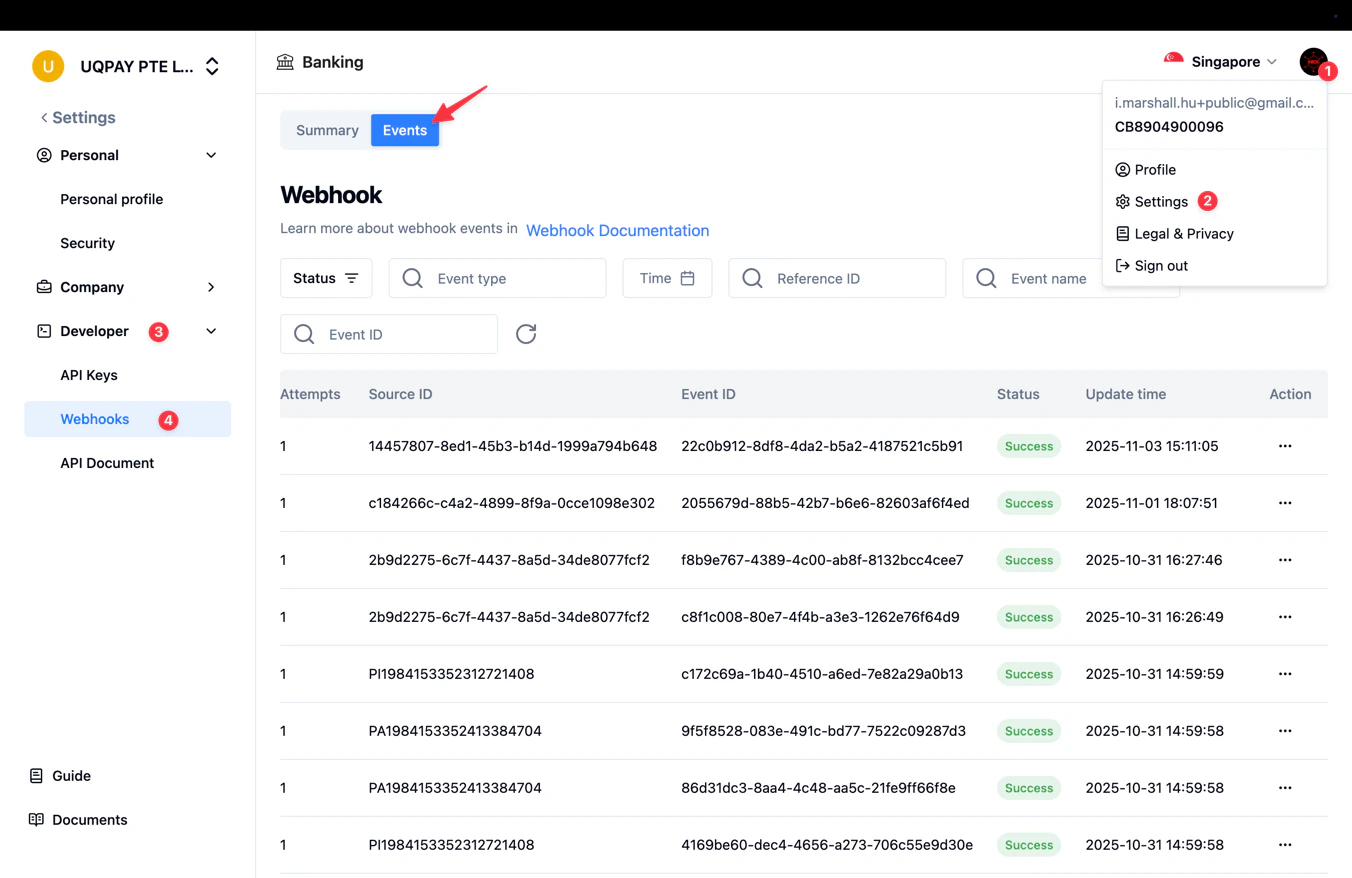
   <img src="https://mintcdn.com/uqpay-0838527a/ynKaMDHkJfeg6L8y/images/account-center/webhooks-setting-s10.png?fit=max&auto=format&n=ynKaMDHkJfeg6L8y&q=85&s=767d1e86762a5d9354a3a627e8b7efa0" alt="Events 标签" width="1352" height="878" data-path="images/account-center/webhooks-setting-s10.png" />

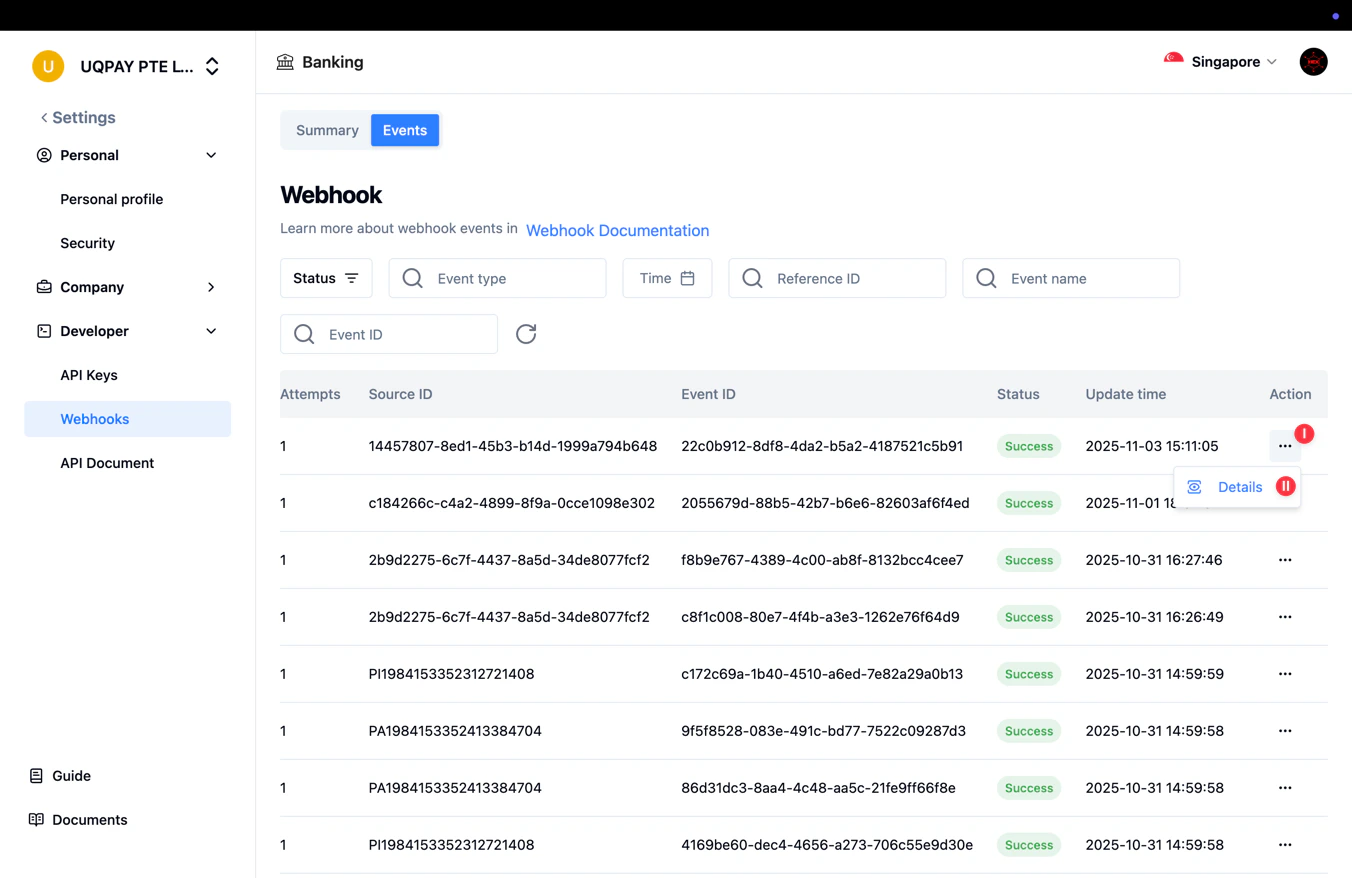
2. 要查看某次投递的详情，点击事件右侧的 **...** 菜单并选择 **Details**。

   <img src="https://mintcdn.com/uqpay-0838527a/ynKaMDHkJfeg6L8y/images/account-center/webhooks-setting-s11.png?fit=max&auto=format&n=ynKaMDHkJfeg6L8y&q=85&s=618d21d1cc3525ee8bb02587140aa074" alt="事件详情菜单" width="1352" height="878" data-path="images/account-center/webhooks-setting-s11.png" />

3. 在详情面板中点击 **Re-Trigger** 重新发送该 Webhook 通知。
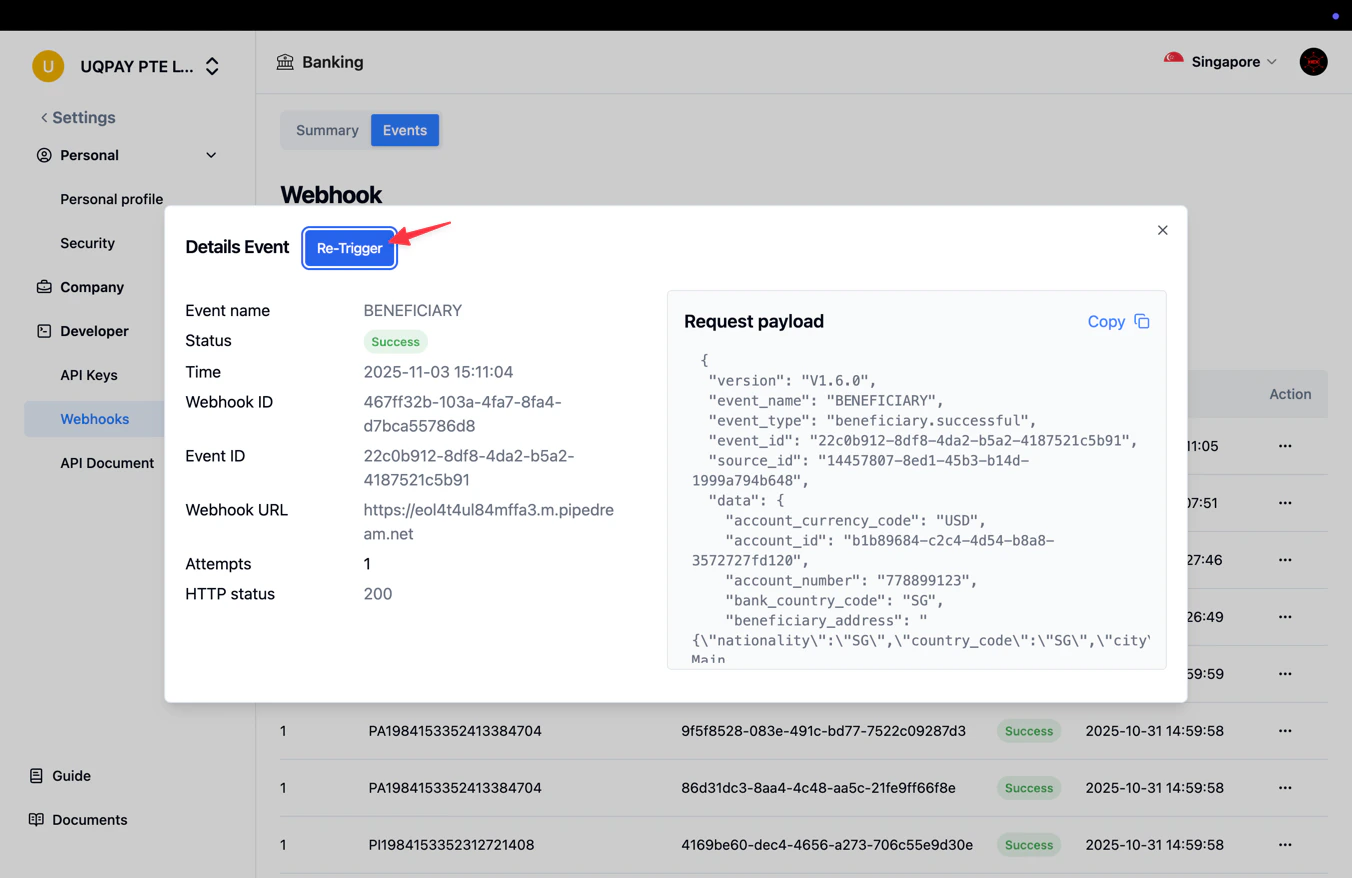
   <img src="https://mintcdn.com/uqpay-0838527a/ynKaMDHkJfeg6L8y/images/account-center/webhooks-setting-s12.png?fit=max&auto=format&n=ynKaMDHkJfeg6L8y&q=85&s=88fcf0fe20c9b9130e5c752c8324ee30" alt="Re-Trigger 按钮" width="1352" height="878" data-path="images/account-center/webhooks-setting-s12.png" />

<h2 id="edit-or-remove-a-webhook">编辑或删除 Webhook</h2>

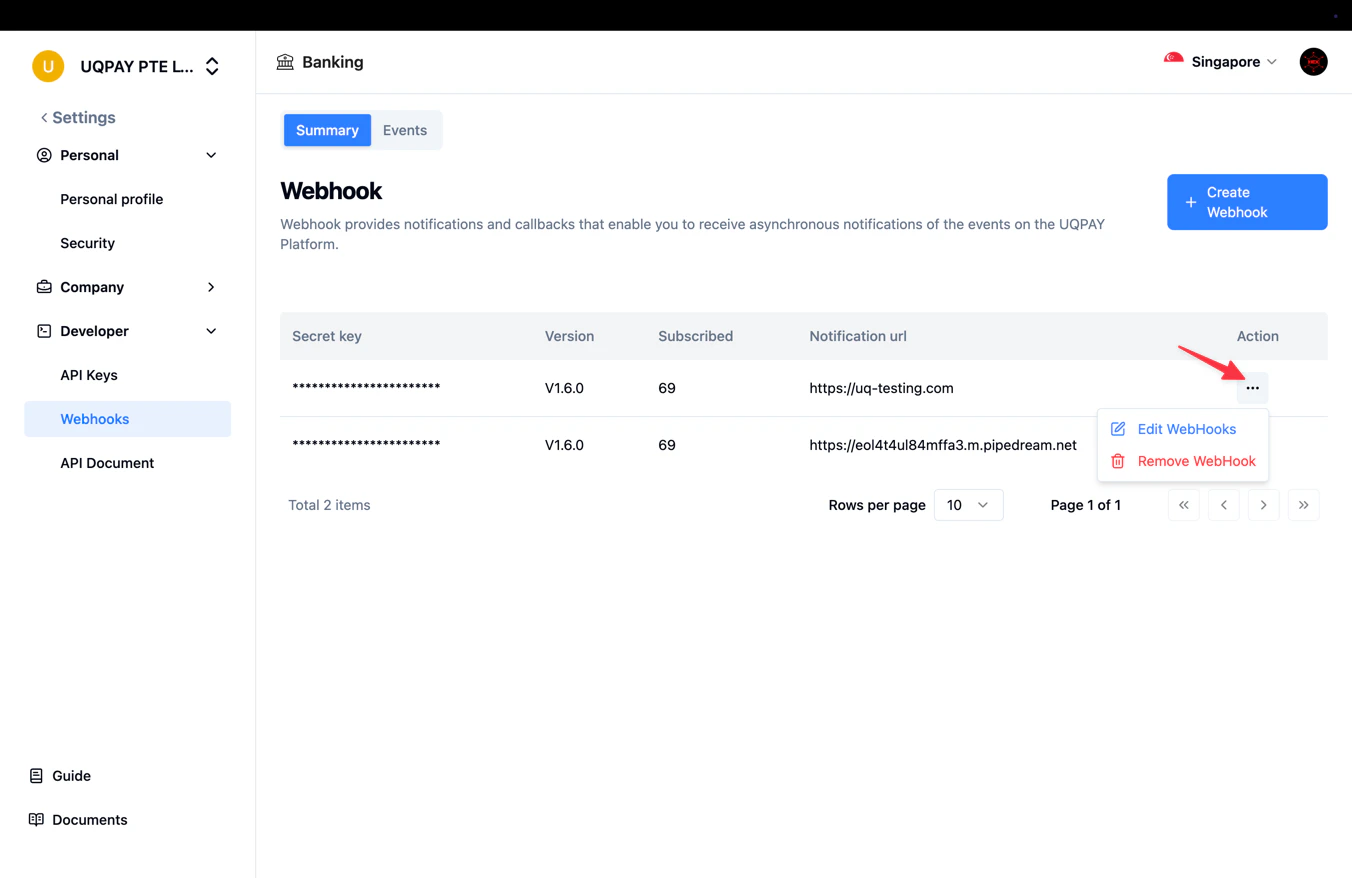
Webhook 创建后，可在 Webhooks 列表中修改其 URL 或订阅的事件类型，也可以整条删除。

<img src="https://mintcdn.com/uqpay-0838527a/ynKaMDHkJfeg6L8y/images/account-center/webhooks-setting-s6.png?fit=max&auto=format&n=ynKaMDHkJfeg6L8y&q=85&s=bf8a271ae16695c0446743e56d9dfc4c" alt="编辑或删除 Webhook" width="1352" height="878" data-path="images/account-center/webhooks-setting-s6.png" />

<h2 id="related">相关文档</h2>

关于签名验证、重试策略和最佳实践，参见 [Webhook 概览](/zh/account-center/v1.6/guide/webhooks-overview)。