> ## Documentation Index
> Fetch the complete documentation index at: https://developers.uqpay.com/llms.txt
> Use this file to discover all available pages before exploring further.
# Create API Keys
> Generate API credentials in the UQPAY dashboard to authenticate your API requests.
Every API request to UQPAY requires two credentials: a **Client ID** (public identifier) and an **API Key** (secret). You generate both from the dashboard.
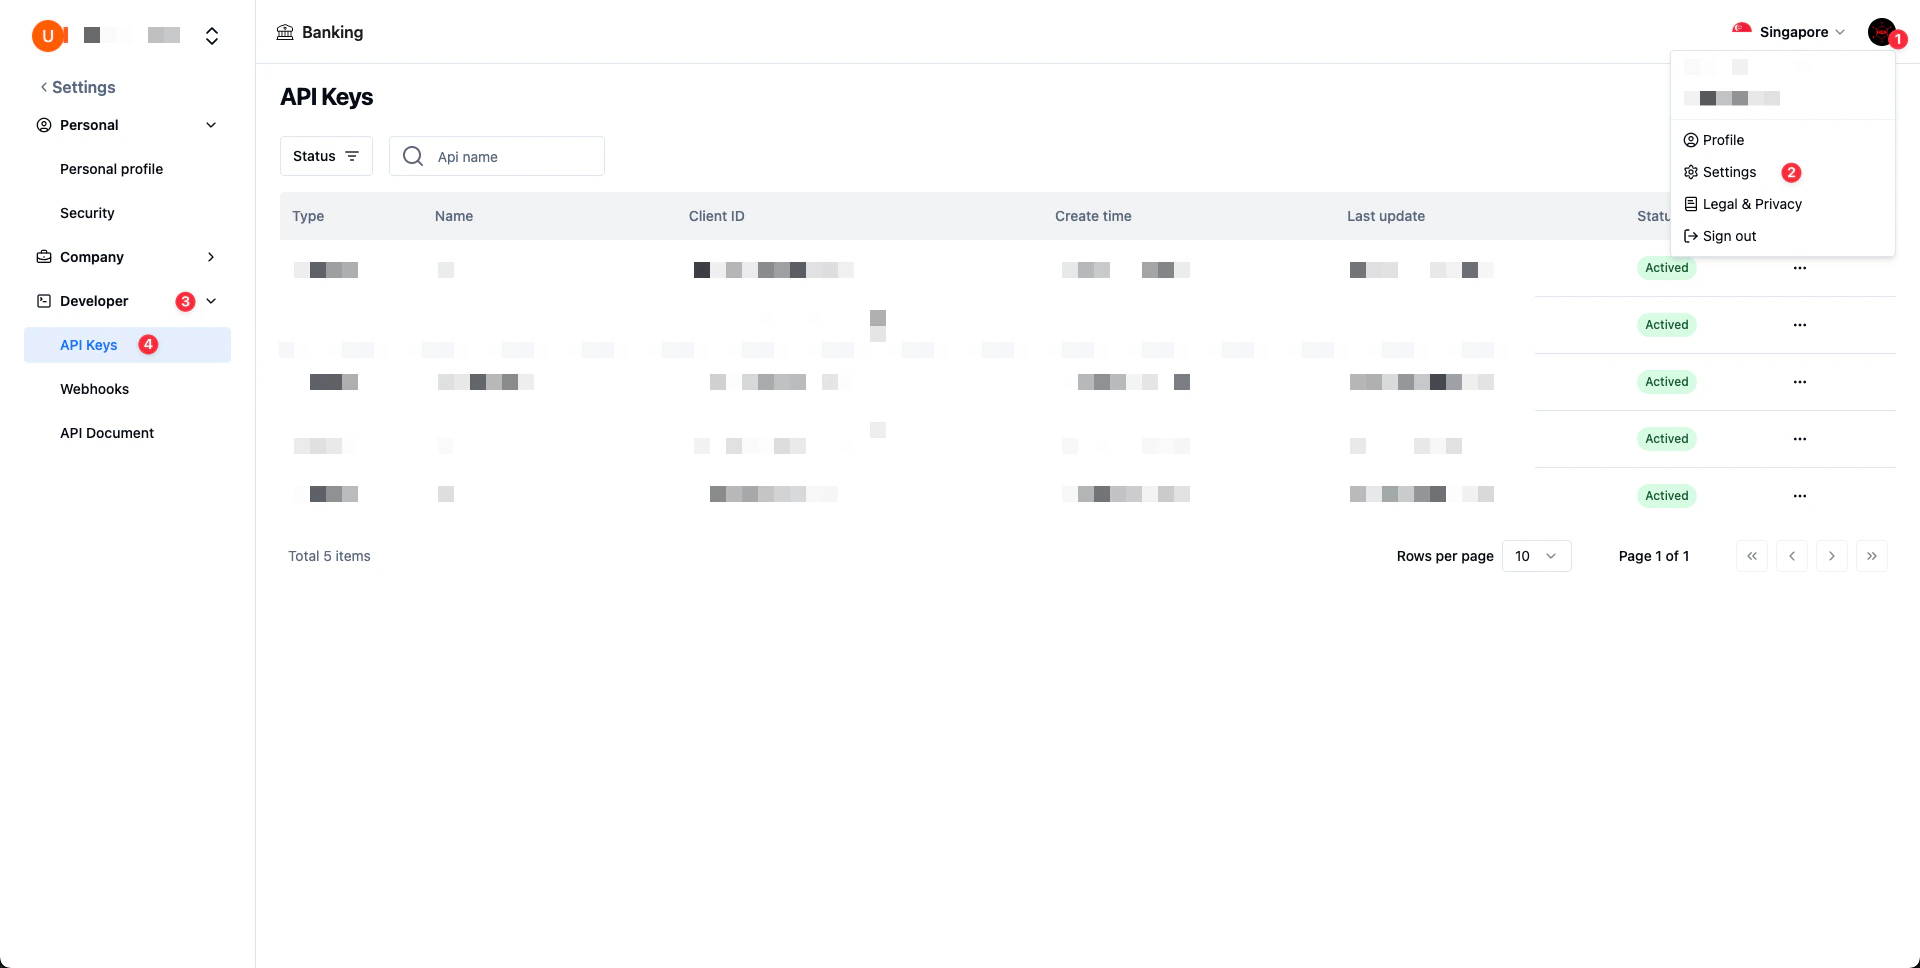
Sign in to the dashboard, click your profile picture in the top-right corner, and select **Settings**. Then navigate to **Developer > API Keys**.
 Click **Create API Keys** in the top-right corner of the API Keys page.
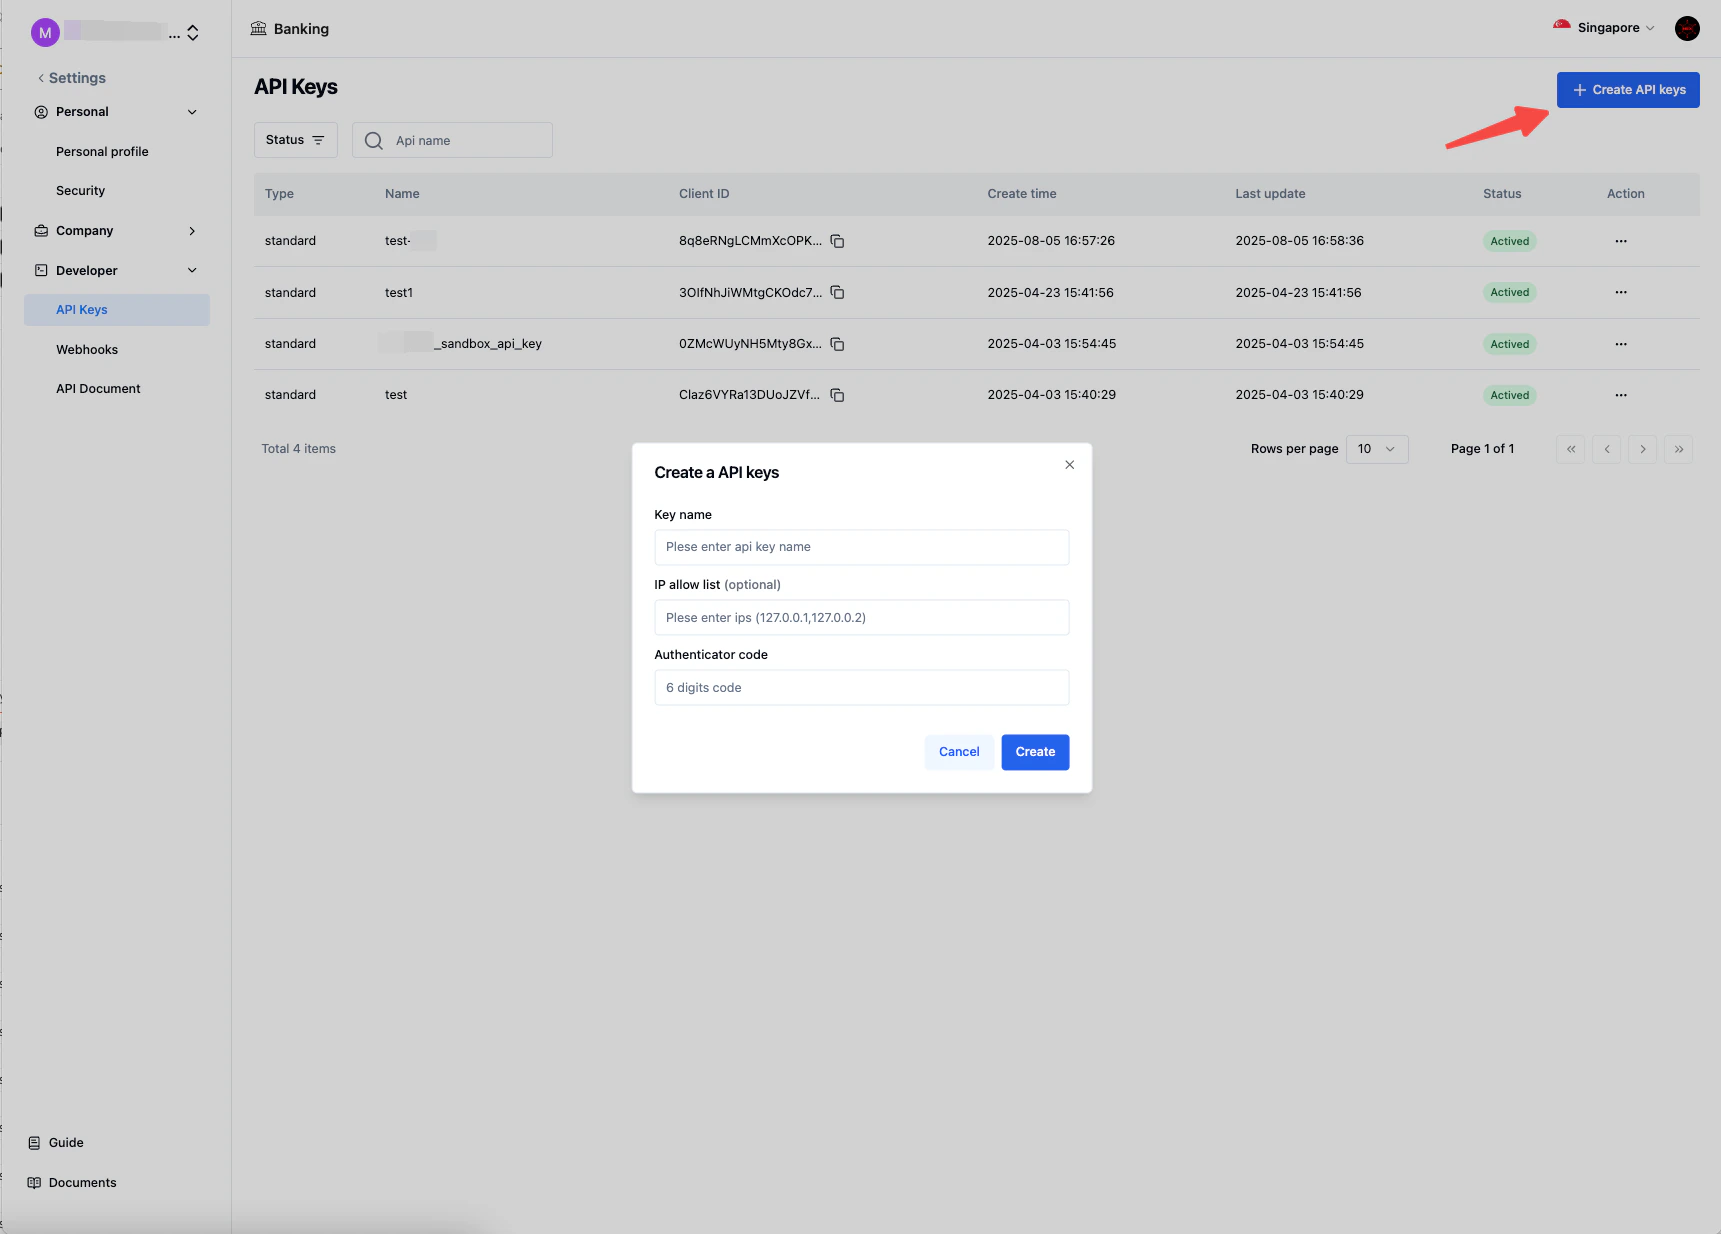 You can configure an IP allowlist during creation to restrict which IP addresses can use this key. You can also edit the allowlist later.
Your API key is displayed on screen after creation.
You can configure an IP allowlist during creation to restrict which IP addresses can use this key. You can also edit the allowlist later.
Your API key is displayed on screen after creation.
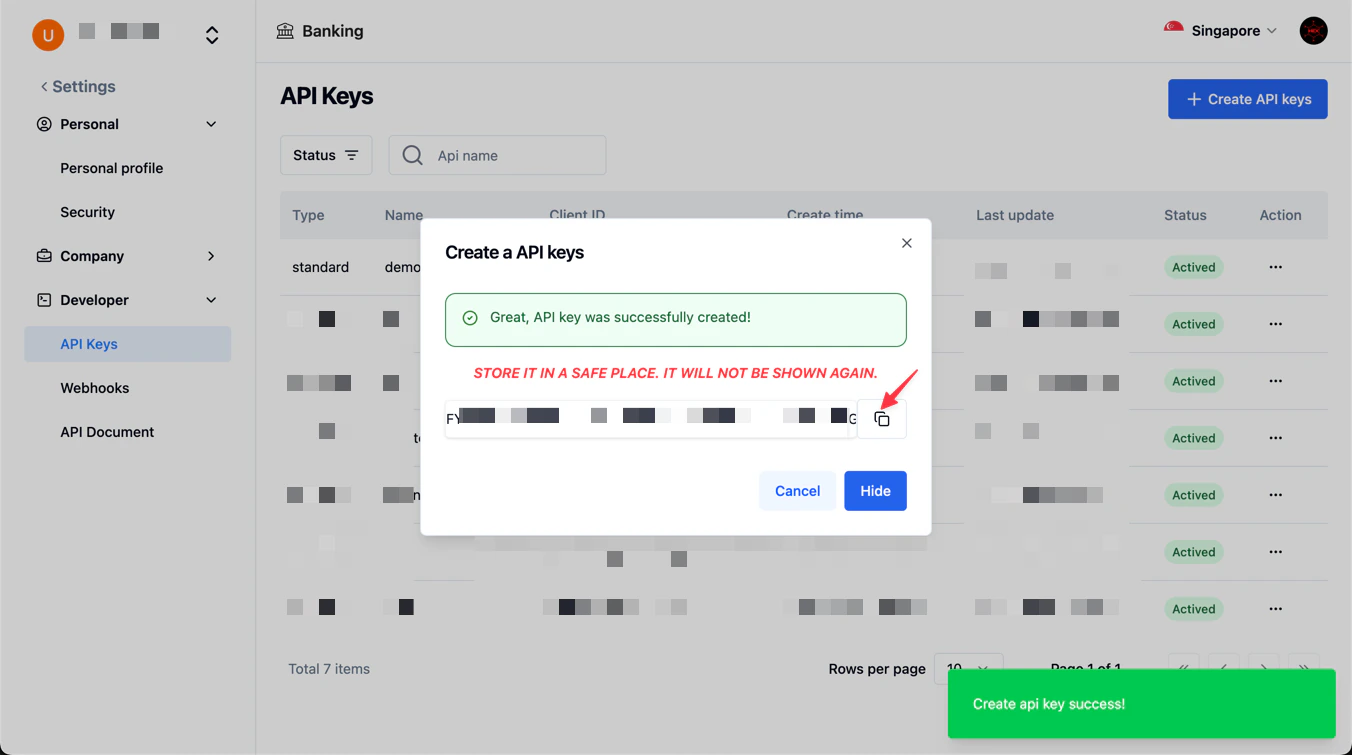 The API key is shown **only once**. Copy it immediately and store it in a secure location. If you lose it, you will need to create a new key.
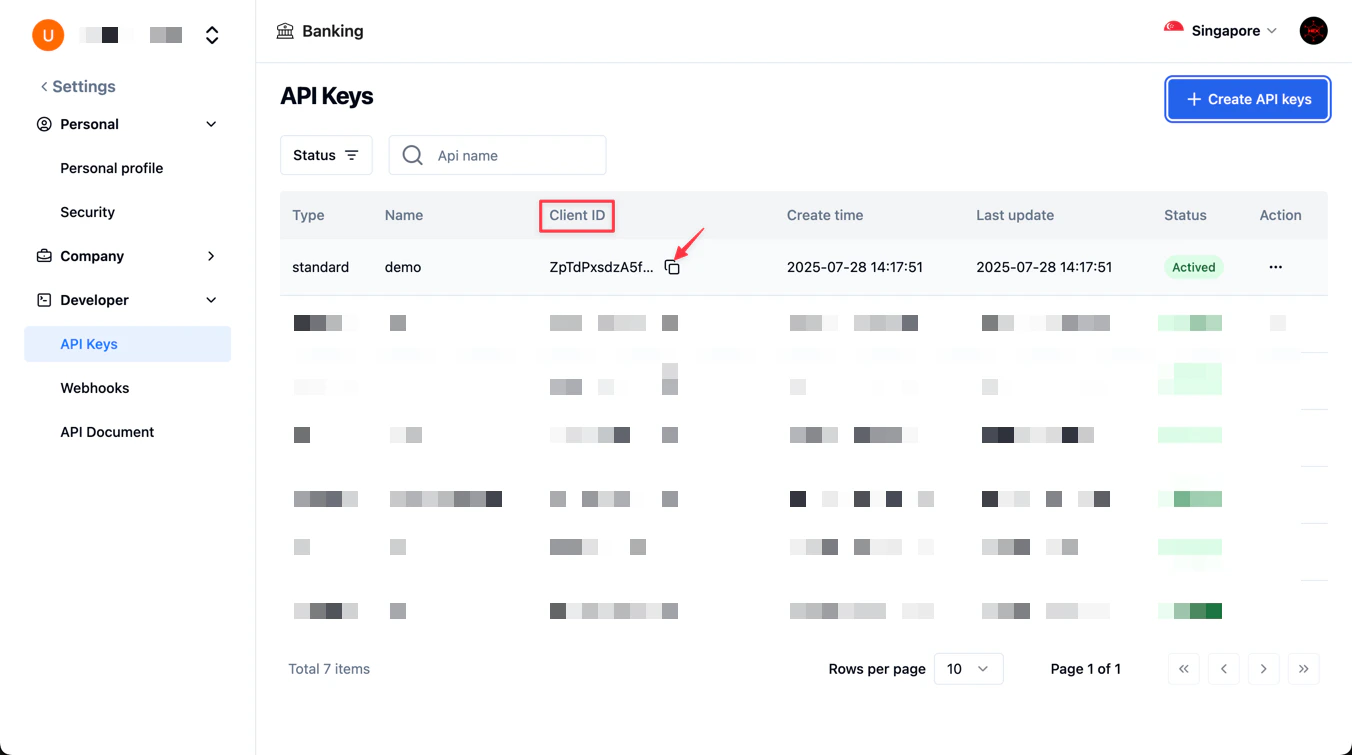
Your Client ID is always visible on the API Keys page — you can view or copy it at any time.
The API key is shown **only once**. Copy it immediately and store it in a secure location. If you lose it, you will need to create a new key.
Your Client ID is always visible on the API Keys page — you can view or copy it at any time.
 Only the master account can generate API keys. To call APIs on behalf of a sub-account, use the `x-on-behalf-of` header — see [Connected Accounts](/account-center/v1.6/guide/connected-accounts).
## Next step
You now have your Client ID and API key. Head to the [Quickstart](/account-center/v1.6/guide/quickstart) to make your first API call.
Only the master account can generate API keys. To call APIs on behalf of a sub-account, use the `x-on-behalf-of` header — see [Connected Accounts](/account-center/v1.6/guide/connected-accounts).
## Next step
You now have your Client ID and API key. Head to the [Quickstart](/account-center/v1.6/guide/quickstart) to make your first API call.